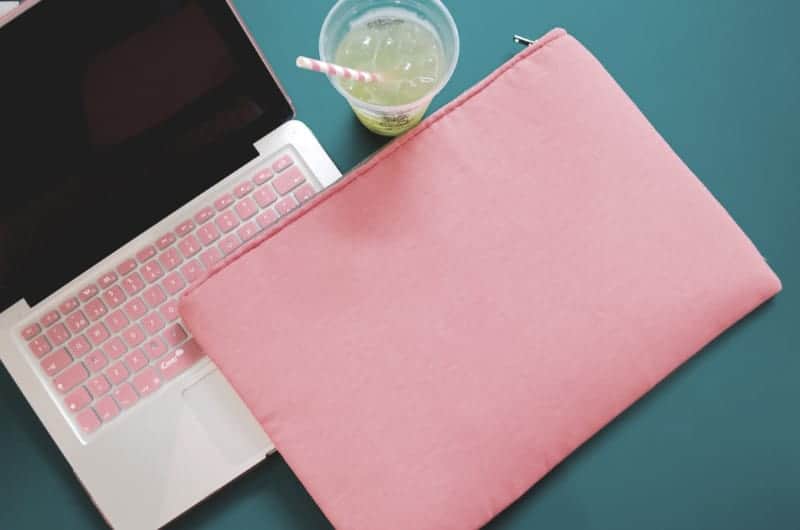
Are you worried that you might never find the perfect laptop case? Why not make your own zippered laptop bag from scratch?
It will require an upfront investment in materials and a bit of hard work.
But in the end, you can enjoy a laptop case that’s literally tailored to meet your needs.
The following is a tutorial on how to sew a laptop case with a zipper.
Keep in mind that this DIY project requires sewing skills.
What You Need
- A 36-inch metal zipper- measure the perimeter of your laptop. The zipper should be long enough that it goes around your laptop at least 3 times.
- ½ a yard of the exterior fabric – you can use leather or canvas
- ½ a yard of lining fabric- it could be fleece or any other soft material
- Fabric for the pocket
- Fusible foam interfacing that should be double-sided
7 Steps of How To Sew A Laptop Case With Zipper
Step 1: Measure Your Laptop Size
Collect all your supplies then determine the size of your laptop. That means taking measurements of the length, width, and height.
For this tutorial, we’ll use a 15-inch laptop as our guide.
Step 2: Cut the Exterior and Internal Fabrics
Start by cutting the exterior fabric and the lining piece. This should be about 1.5 inches longer than the sides of your laptop.
In the case of the 15-inch laptop, you’ll end up with 16.5 x 21.5 inches of fabric.
Also, cut the interfacing at least 1 inch less than the size of the exterior and interior fabrics.
Thus, the interfacing should measure 15.5 x 20.5 inches.
Step 3: Preparing the Ends of the Zippers
The next thing is to start preparing the ends of the zippers. Using the fabric for the exterior, cut out a small rectangle and fold it in half.
When folding, ensure the wrong sides are on the interior and that the side directly underneath the zipper’s teeth is on either end of the zipper.
If you’d like to incorporate a pocket on your zippered case, then cut out a pocket of the pleater and lining.
The fabric should have a width of about 1.5 inches and a couple of inches longer than the pocket.
Step 4: Sewing Process
Start sewing one of the raw sides of the lining to the pocket. The right sides should be facing each other.
Turn the pocket to the rear side and press the seam allowance and the binding in the toward of the top edge.
Fold the binding fabric, allowing it to intersect with the seam allowance.
You’ll also need to fold the multi-layer of the fabric so that it’s over the back of the pocket.
Place pins all around the perimeter of this pocket and then start sewing. Sew close to the area where the fabrics join.
Trim the sides of the binding to about ½ an inch.
Fold the exterior fabric in half and use pins to attach the pocket onto one side. Top-stitch the pocket to hold it firmly in place.
Locate the middle point of the laptop case outer fabric and place a pin to serve as a marker. Put the center of the zipper tab at this point and attach temporarily using a pin.
Pin the zipper starting from the central point you marked and work your way all-around half of the sleeve till you reach the other center point.
By now, the right side of the zipper ought to be on the right side of the outer fabric.
Step 5: Easing the Zipper
One of the most challenging steps is easing the zipper around the corners.
Ensure you don’t pull the zipper too tightly when pinning.
Then, in a relaxed state, sew the corner. This should result in a slightly rounded design.
Next, you’ll have to open the zipper closure so that you can pin it on the other side of your laptop sleeve.
Upon opening, the zipper should lay flat except for those sections where the zipper taps reach the middle marker.
Here, it’s important that you press hard to get this section to flatten.
Stitch the zipper all around the sleeve’s edge using a zipper foot. This should result in a zipper closure that is firmly attached to the main fabric.
Be careful when sewing around the corner of the zip.
Once you’re done sewing, trim off the seam allowance and the extra tab fabric that you left at the ends of the zipper.
Step 6: Put All Together
With the right sides of the fabric facing each other, add the lining and put pins along the edge to hold it in place.
This will result in three layers- exterior fabric, zipper, and the lining.
The next step is to sew these layers together.
However, leave a sizeable opening to allow for turning.
Flip the case to the right side using the opening and insert your preferred padding material.
Next, fold the interfacing in the middle and incorporate it through the opening.
Then, unfold it and work your way through to ensure it fits nicely inside the lining.
The goal here is to get the interfacing and padding to lay flat and to cover most of the surface.
The one area you’ll have a problem flattening out is the area on the pull tab section of the zipper.
Thus, you’ll need to apply more effort in this spot.
Once you’ve leveled it out, close the opening. To achieve this, simply stitch the seam allowance to the zipper.
For this step, you can hand-stitch the seam allowance so that the stitching marks are not visible on the exterior.
Step 7: Ironing
Press the side containing the lining with a hot iron.
If you want to press the pleather or leather side as well, be sure to place a scrap fabric or towel on the surface to act as a barrier.
You should never iron the leather material directly as this can ruin its texture.
After pressing, your case is ready for use!
Conclusion
Making your own zippered laptop case is not as difficult as most people perceive it to be.
With the right tools, instructions, and hard work, you can make a quality laptop sleeve that is tailored to your needs.
Our tutorial helps you make a padded laptop sleeve with a zipper closure and exterior pocket.